What do you need?
Teslalogger Raspberry kit:
https://e-mobility-driving-solutions.com/produkt/raspi-teslalogger-2/?lang=en
If you already hava a Raspberry Pi3B, the Image is the best choice:
https://e-mobility-driving-solutions.com/produkt/teslalogger-image/?lang=en
Or the free Teslalogger Docker:
https://github.com/bassmaster187/TeslaLogger
And ScanMyTesla with Dignostic cable:
https://e-mobility-driving-solutions.com/produkt-kategorie/cable/?lang=en
Settings:
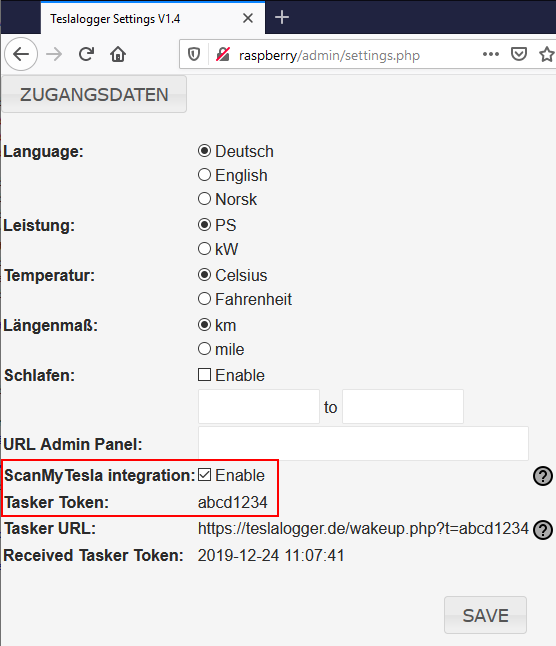
ScanMyTesla is able to send data directly to your Teslalogger. Please turn on the feature in Teslalogger’s settings panel.
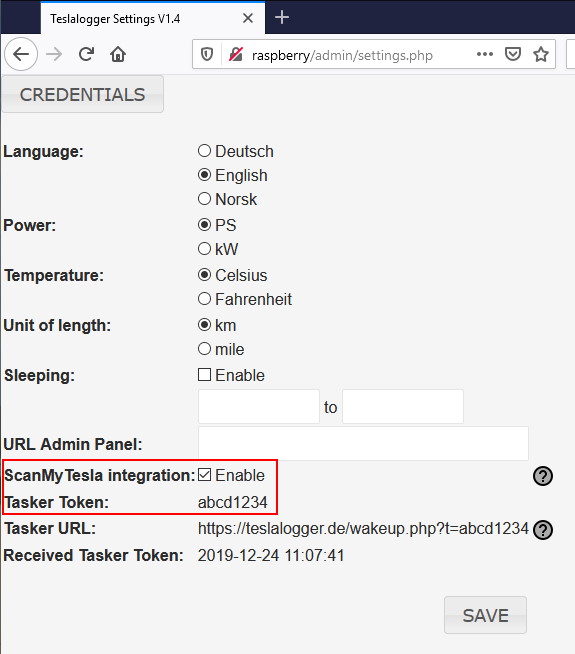
We will need the Tasker Token later!
Please enable the ScanMyTesla integration feature and click on the save button. After a restart you can see in the logfile if enabling ScanMyTesla feature was successful.
27.12.2019 13:35:57 : UseScanMyTesla: True
27.12.2019 13:35:57 : DB Version: 10.1.37-MariaDB-0+deb9u1
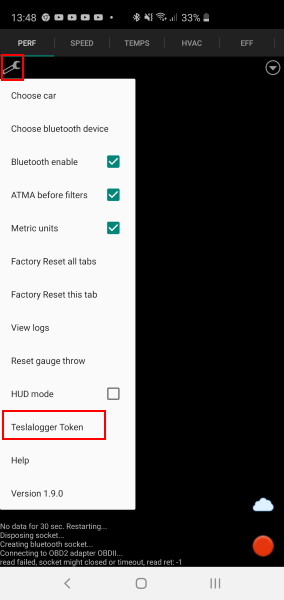
Now start ScanMyTesla and click on “Teslalogger Token” in settings panel of ScanMyTesla:
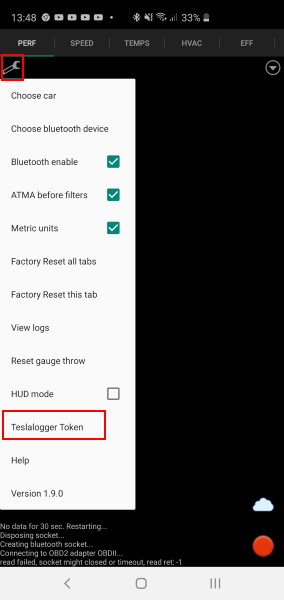
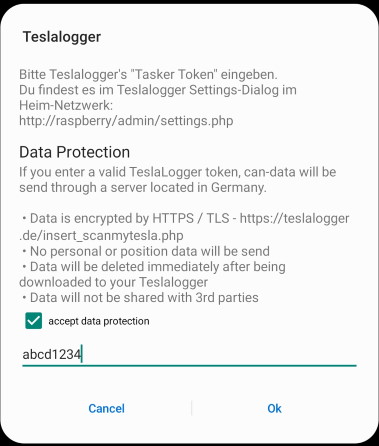
Please accept the data protection and enter the Tasker Token mention before.
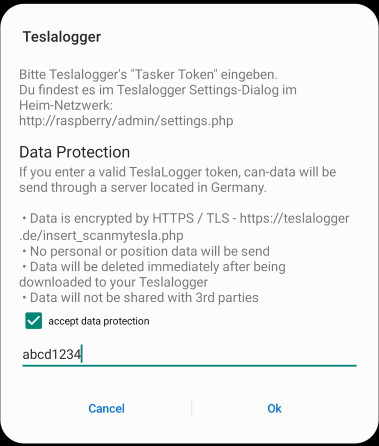
If your Token is valid, you’ll get a message. Make sure you have a internet connection:

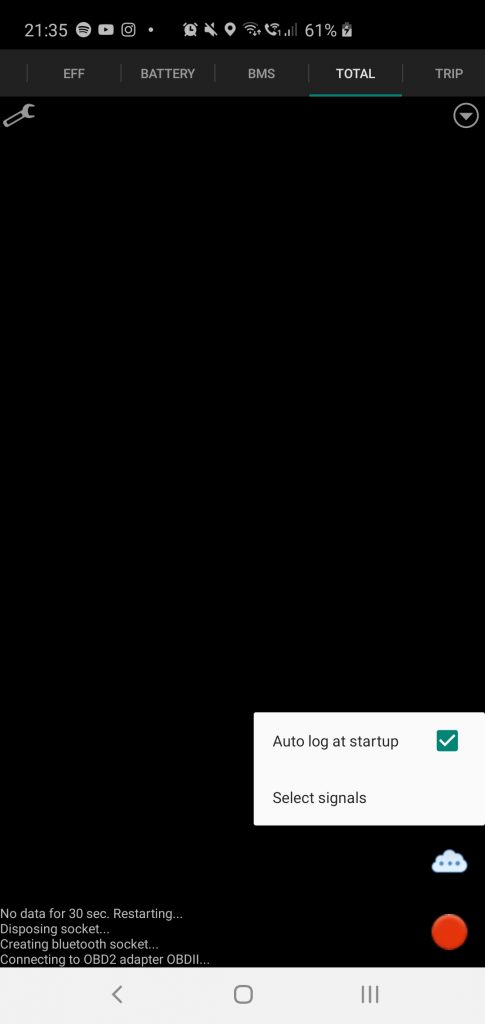
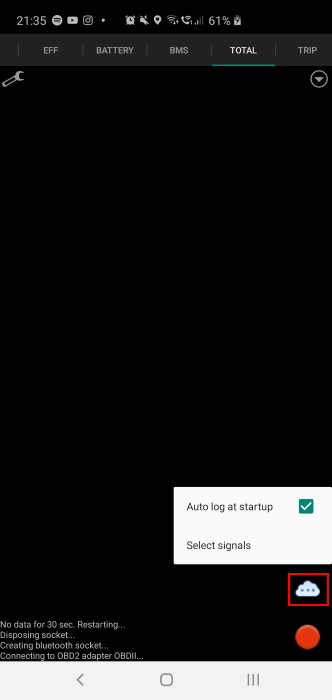
Now you can see a cloud on the lower right.
- Cloud with 1-3 points: Communication OK
- Cloud with red cross: No Internet connection
- Cloud with grey cross: user communication disabled
With a click on the cloud icon you can switch the communication on or off. A long click opens the options menu.
When data has been successfully received in the Teslalogger, you can see in the logfile:
24.12.2019 11:08:55 : ScanMyTesla: insert ok [6] 12/24/2019 11:08:19 AM
24.12.2019 11:08:58 : ScanMyTesla: insert ok [9] 12/24/2019 11:08:24 AM
24.12.2019 11:09:00 : ScanMyTesla: insert ok [21] 12/24/2019 11:08:29 AM
